I had installed base Windows Server 2012 Core to a virtual machine and tried to upgrade it to the GUI version. Had a crazy error:
0x800f0906 or ‘the source files could not be downloaded’ error
My machine was not on the network and I had the install CD. I could not get it to install at all. Did some digging and found that the following will work. Be sure to include the colon ":" after the word '-Source' and after the 'WIM' tag for the source location. Knowing the correct index in the install WIM is important as well.
First, confirm your edition index in install.wim: dism /get-wiminfo /wimfile:d:\sources\install.wim
Index:1 Windows Server 2012 SERVERSTANDARDCORE
Index:2 Windows Server 2012 SERVERSTANDARD
Index:3 Windows Server 2012 SERVERDATACENTERCORE
Index:4 Windows Server 2012 SERVERDATACENTER
It will produce Win Server 2012 R2 SERVERSTANDARD as index 2, then: Intall-WindowsFeature Server-Gui-Mgmt-Infra -Source:wim:d:\sources\install.wim:2
The last number is the edition index, change to 4 if running in SERVERDATACENTERCORE.
Using the Dism command works as well, but it is a longer process, since you have to mount the WIM file.
USING A SHARE NAME from an existing machine:
Dism /Online /Enable-Feature /FeatureName:Server-Gui-Mgmt /All /Source:\\[serverfqdn]\c$\Windows\WinSxS /LimitAccess
Found a great article on creating an unattended xml and creating an ISO from Ezra Undag post at:
https://medium.com/tech-jobs-academy/creating-a-windows-server-2012-r2-core-unattended-installation-iso-ab8071c03279#.dzuri1h35
The steps are as follows, but for more details, take a look at his post.
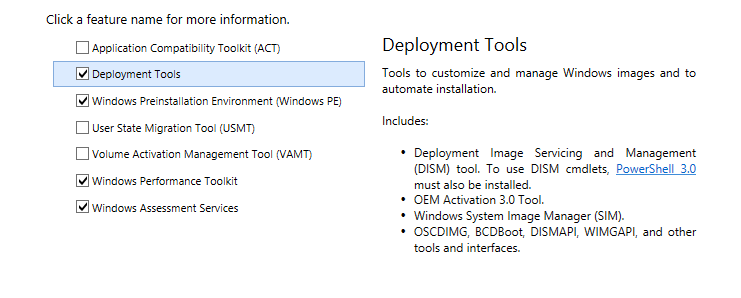
Start the installation process. Leave everything selected by default but make sure that Deployment Tools and Windows Preinstallation Environment(Windows PE) are selected.
Select the features you want to install Window Dialog
3. Finish the installation.
II. Create an answer file
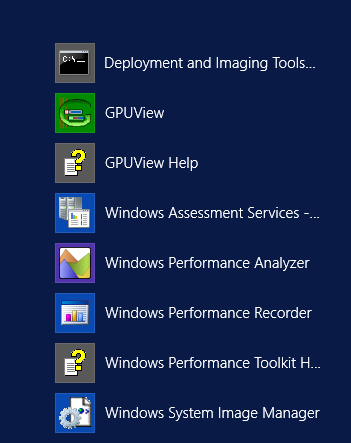
Open Windows System Image Manager by going to Start Menu > Apps List or by hitting Windows key + S combination keys and typing in “Windows System Image Manager”.
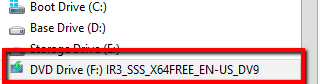
2. Mount the ISO file by double-clicking it or opening it via File Explorer. It displays a new drive indicated by a letter.
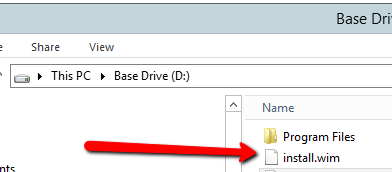
3. Go to sources directory and copy install.wim to a local drive, such as D.
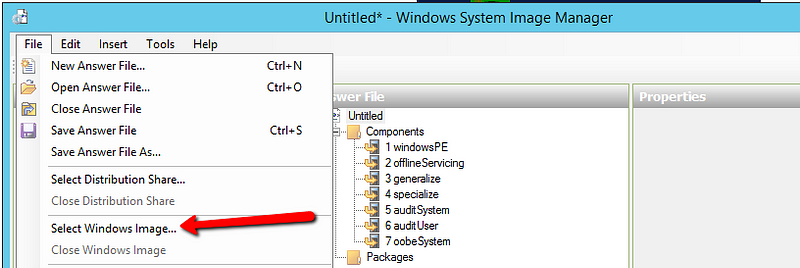
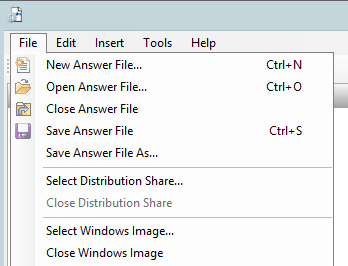
4. Switch back to Windows System Image Manager. Click File Menu > Select Windows Image, locate the install.wim you copied.
5. Select the Windows Distribution to build an answer file for. We select Windows Server 2012 R2 SERVERDATACENTERCORE.
Select an image in the Windows image file
6. The Windows Image pane is populated with Components and Packages folders. Expand Components and scroll through until amd64_Microsoft-Windows-International-Core-WinPE_6.3.9600.16384_neutral. [..6.3.9600.16384_neutral]may differ on other Windows distributions. Right click on amd64_Microsoft-Windows-International-Core-WinPE_6.3.9600.16384_neutral and click Add Setting to Pass 1.
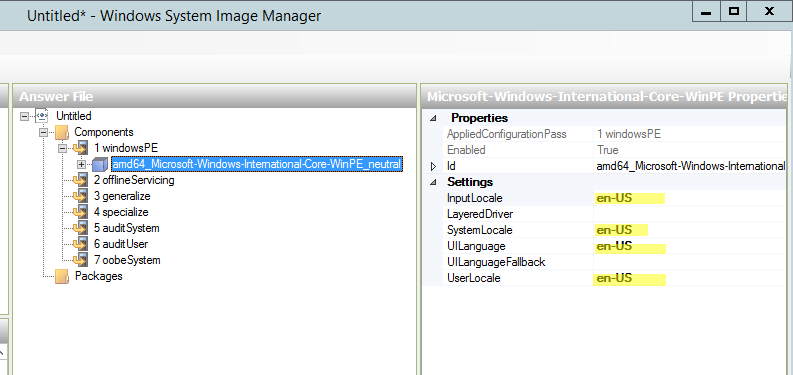
7. Under Answer File pane, collapse Components > 1 windowsPE and select amd64_Microsoft-Windows-International-Core-WinPE. Configure settings according to your requirements or the image shown below.
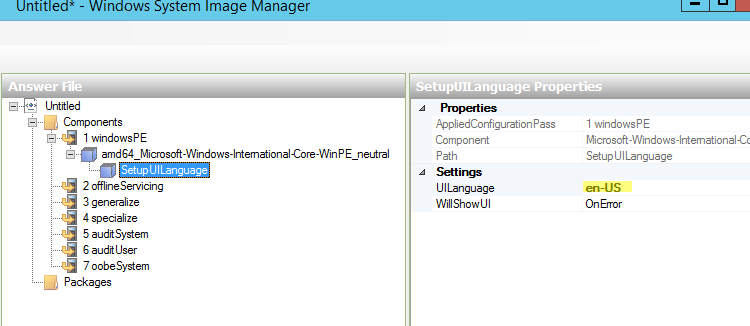
8. Collapse Components > 1 windowsPE > amd64_Microsoft-Windows-International-Core-WinPE and select SetupUILanguage. Configure settings according to your needed language or the image shown below. In this case, we use en-US(US English).
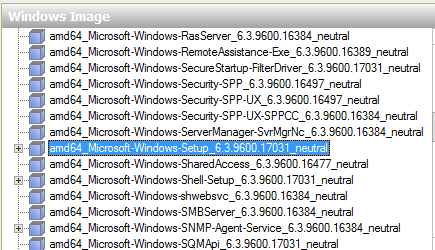
9. In this step, we configure disk partitions by scrolling through Windows Image pane under Components until amd64_Microsoft-Windows-Setup_6.3.9600.17031_neutral is found. [_6.3.9600.17031_neutral] may differ in other Windows distributions. Right click on amd64_Microsoft-Windows-Setup_6.3.9600.17031_neutral and click Add Setting to Pass 1.
11. Under amd64_Microsoft-Windows-Setup_neutral, find DiskConfiguration and right click on itand select Insert New Disk.
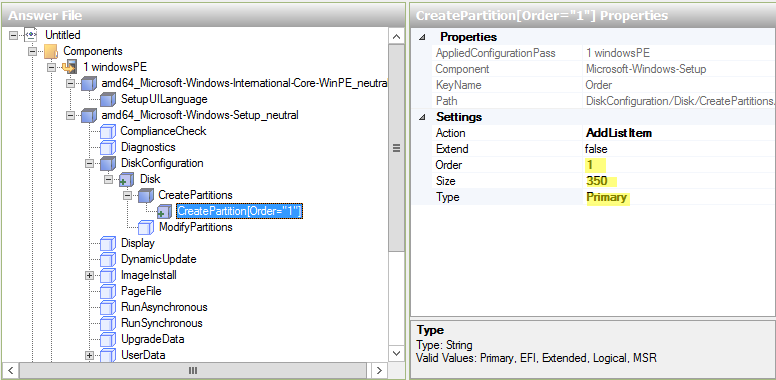
12. In DiskConfiguration > Disk, right click on CreatePartitions and select Insert New CreatePartition. Configure the partition as shown in the image below. This partition becomes the System Reserved Partition which contains hardware-related files and the Boot folder that tell a computer where to look to start Windows. In Windows 7 and Windows Server 2008, the partition is 100MB. In Windows 8 and Windows Server 2012, it is 350MB.
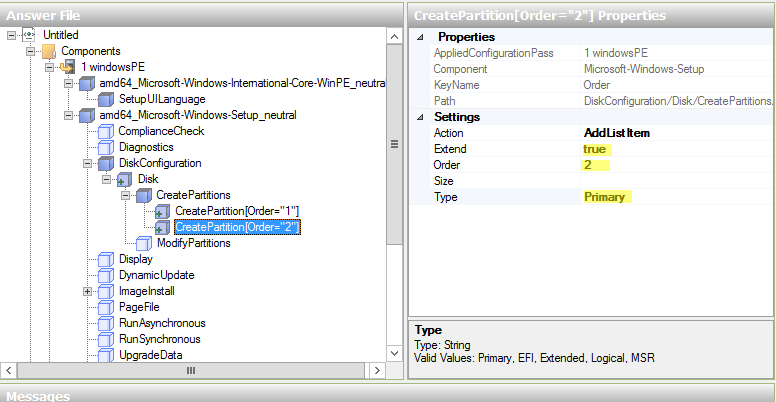
13. Right click on CreatePartitions and select Insert New CreatePartition to create a second partition then set Extend to true. This means that the partition takes up the rest of the disk. This becomes our logical partition where the Operating System is installed.
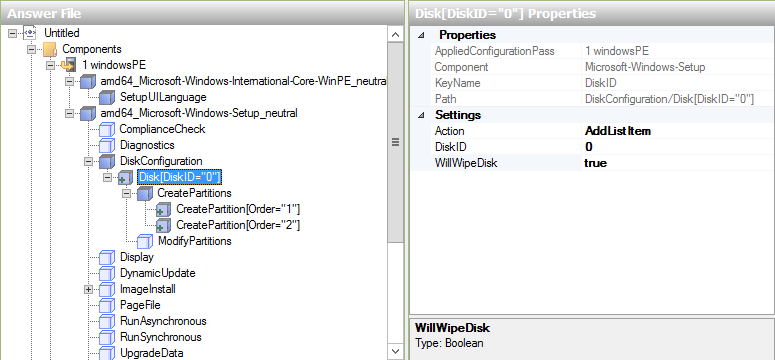
14. Click on Disk under Disconfiguration. Set DiskID to 0 and WillWipeDisk to true. Disk 0 is generally the first disk in most computer systems where the Operating System resides.
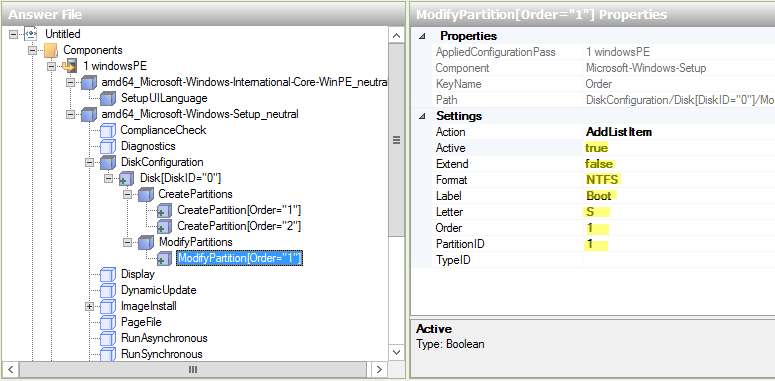
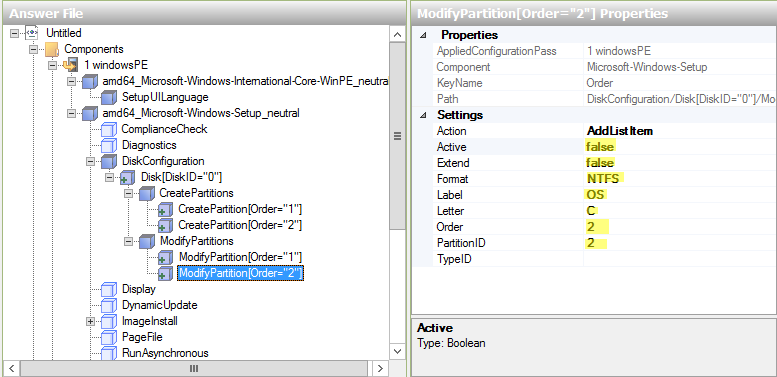
15. Modify the System Reserved Partition by right-clicking on ModifyPartitions and selecting Insert New ModifyPartition. Configure settings as shown in the image below.
16. Modify the logical partition by right-clicking on ModifyPartitions and selecting Insert New ModifyPartition. Configure settings as shown in the image below.
17. Select ImageInstall and configure settings as shown in the image below. This means we do not install to the available partition because we are specifying it later.
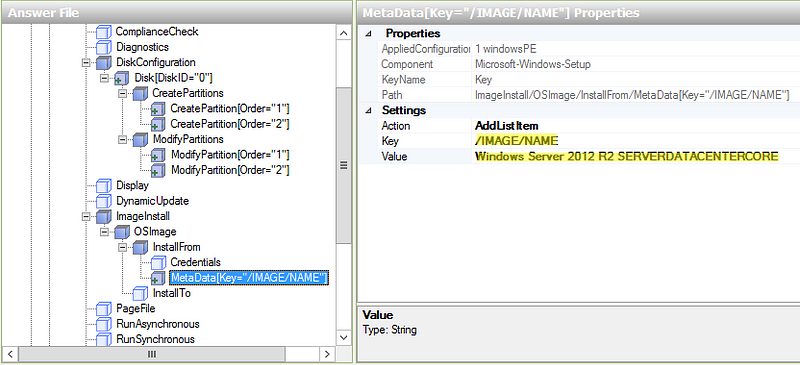
18. Specify the OS to install. Collapse OSImage, right-click on InstallFrom and select Insert New MetaData. Collapse InstallFrom and select Metadata. Configure the settings as shown in the image below. Key field can be set to /IMAGE/NAME , /IMAGE/INDEX, or /IMAGE/DESCRIPTION. In this case, we use /IMAGE/NAME to correspond to the name of the Windows Distribution selected in step 5.
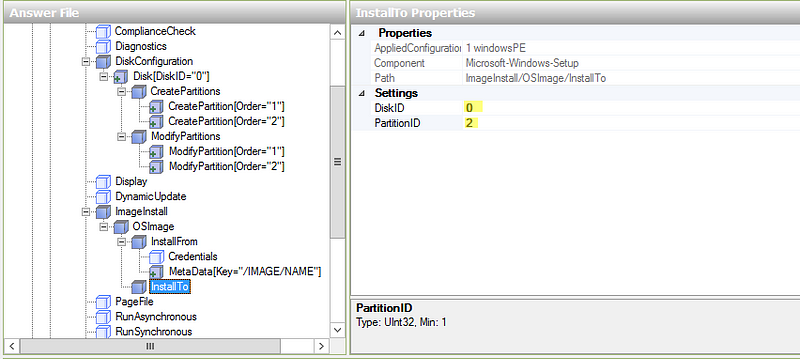
19. Set the Disk and Partition where OS will be installed. Select InstallTo and configure settings as shown in the image below.
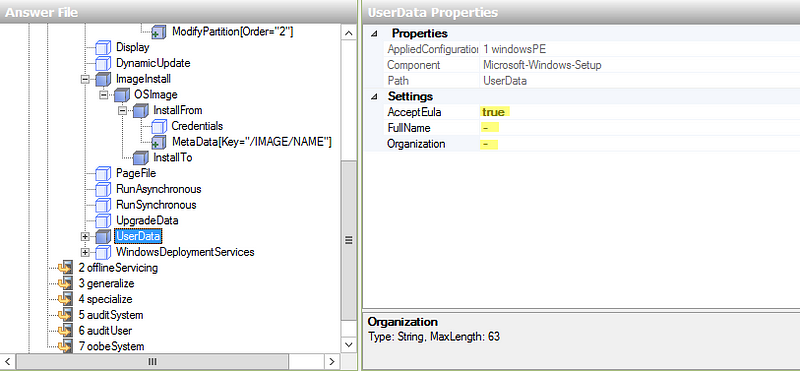
20. Bypass EULA Dialog. Scroll down to find UserData and select it. Configure settings as shown in the image below. Fill up FullName and Organization if desired.
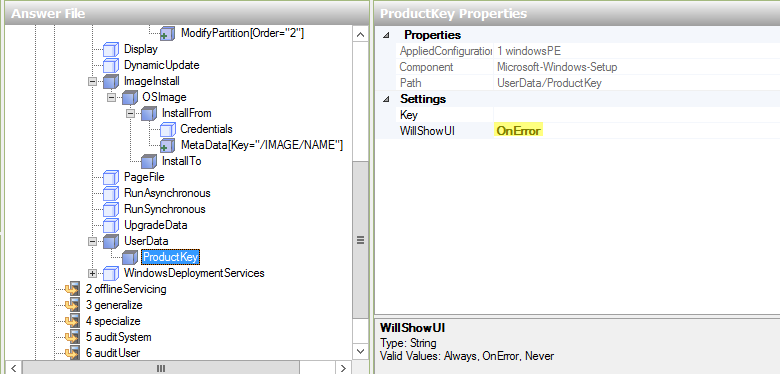
21. Configure UserData > ProductKey. This is not where we provide the product key. Leave empty as shown in the image below.
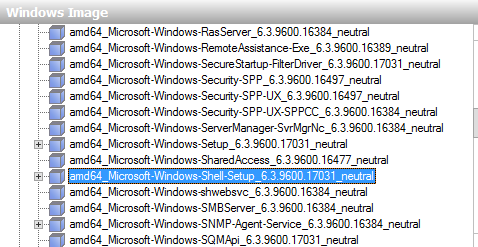
22. Set Computer name, product key, organization name and timezone. Scroll through Windows Image pane and find amd64_Microsoft-Windows-Shell-Setup_6.3.9600.17031_neutral, (6.3.9600.17031 may differ in other Window distributions)right-click on it and select Add Setting to Pass 4 specialize.
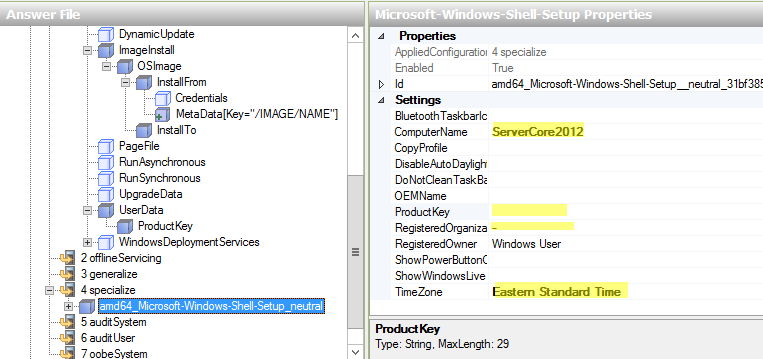
23. In Answer File pane, collapse 4 specialize and select amd64_Microsoft-Windows-Shell-Setup_neutral configure settings as shown in the image below. If desired to set random computer name during installation, set [* ] (asterisk symbol)to ComputerName field. By default, TimeZone is set to Pacific Standard Time.
In this case, we are using an evaluation copy for Windows so we are leaving ProductKey empty.
24. In Windows Image pane, right-click on amd64_Microsoft-Windows-Shell-Setup_6.3.9600.17031_neutral andselect Add Setting to Pass 7 oobeSystem to specify Out of Box Experience (oobe) settings.
25. In Answer File pane, select amd64_Microsoft-Windows-Shell-Setup_neutral and configure settings as shown below.
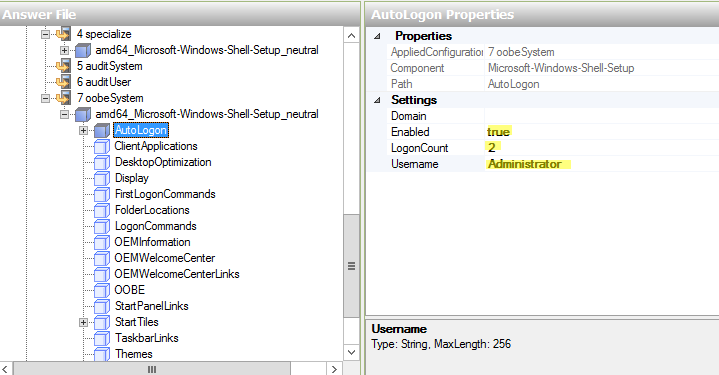
26. Collapse amd64_Microsoft-Windows-Shell-Setup_neutral, select AutoLogon and configure settings. Set LogonCount to 2 so that image build process goes quicker and in case administrator password is not configured in the answer file, we can reset it during the first two reboots.
27. Collapse AutoLogon, select Password and type in the the password which is automatically encrypted during installation. In this case, we type in a sample password. Please provide a more secure password.
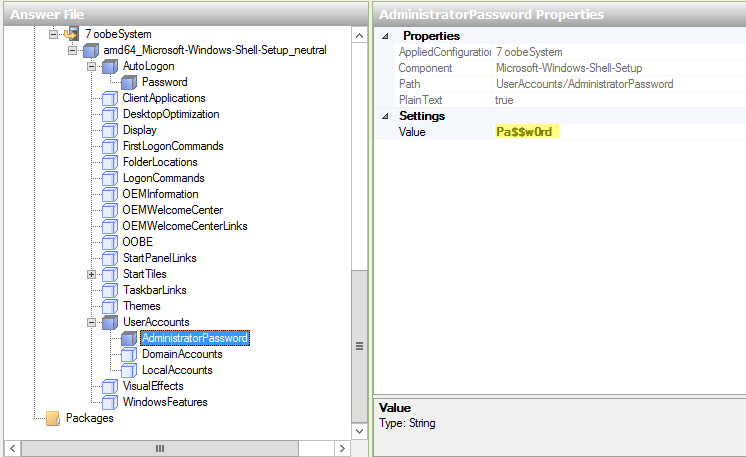
28. In Answer File pane, scroll down to find UserAccounts and collapse it. Select AdministratorPassword and provide the same password as in the step 26.
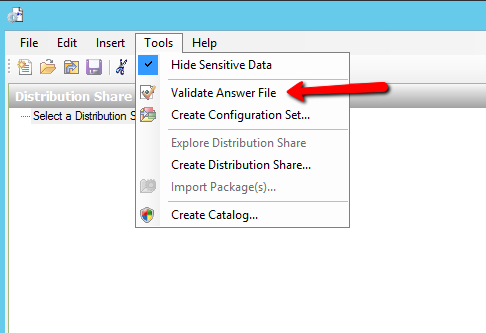
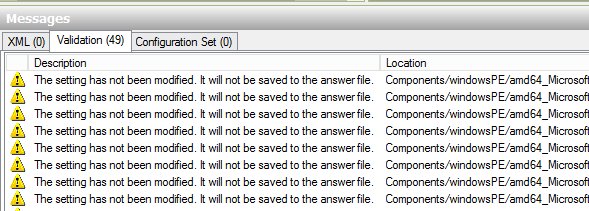
29. Validate answer file. Click Tools menu, and select Validate Answer file. Make sure there are no errors in the Messages pane. Validation warnings are fine and normal.
30. Save answer file as autounattend.xml. This is placed in the root directory of our ISO image as instructed in the next section.
II. Generate an unattended installation ISO
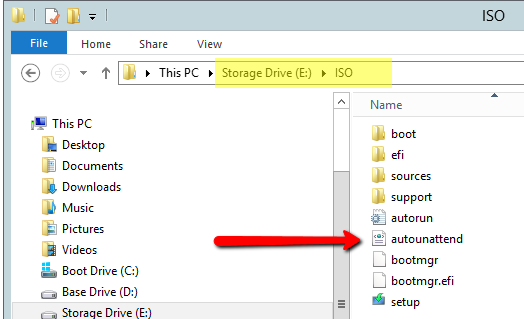
In the previous section step 2, we mounted the ISO image that created a new DVD drive F. Copy and paste all the contents in DVD drive F to a folder in the computer’s disk. In this case, we created drive ISO folder in local drive E. Put autounattend.xml file to the ISO folder as shown in the image below.
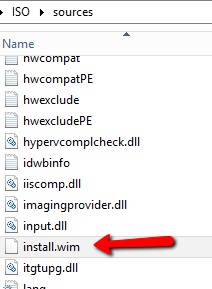
2. In the sources directory, delete install.wim and replace it with the install.wim we copied and pasted to local drive D in the previous section step 3.
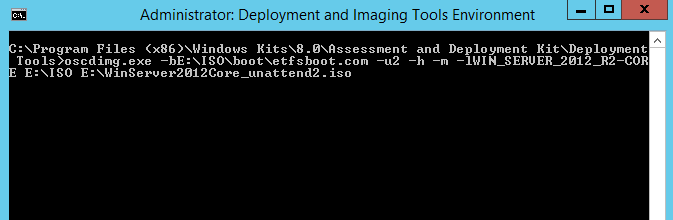
3. Launch Deployment and Imaging Tools Environment (included in Windows ADK).
4. Generate a new bootable ISO for unattended installation. Use oscdimg.exe command as in the image below. Update the paths accordingly.
–b points to the etfsboot.com file which is necessary for bootable media such as CDs and DVDs. This file will be written to the boot sector of the disk.
–u2 this option is used to produce an image that has only the UDF file system on it.
-h this option will include all hidden files and directories under the source path for this image.
–m specifies that the file size can be larger than the maximum size limit.
–l is the label of the media that will be created.
5. Locate new ISO in drive E with file name WinServer2012Core_unattend2.iso. Configure a VM using Hyper-V or physical server to boot from it and verify that there are no prompts or errors during the installation process. Note that the disk configuration and data will be wiped during the seamless unattended installation process.
I needed a system that would dual boot Windows Server 2012 with Centos 7.
I used half of the physical drive to create the Windows NTFS partition and installed Windows Server 2012 there. Then with the remaining space, I installed Centos 7 on the remaining free space.
As expected, the Windows install does NOT show up in the boot loader menu.
Here is the instructions I followed to get it to display the Windows OS option. Worked without issues.
to find out, on what partition Windows is actually installed (for me it is 0/sda1), run
fdisk -l
for example, it shows ....
/dev/sda1 * 2048 718847 358400 7 HPFS/NTFS/exFAT
....
to find out partion UUID, by using blkid /dev/sda1 and find matching UUID
blkid /dev/sda1
then add the menu entry to /boot/grub2/grub.cfg like
menuentry "Windows 2012 R2" --class windows --class os { insmod ntfs set root='(hd0, 1)' search --no-floppy --fs-uuid --set=root XXXXXXXXXXXXX(UUID from step 2) chainloader +1 }
loves to study the prophecies of Daniel and Revelation. He is currently working on M.A. in Religion & Evangelism. He is a student of preaching and teaching.